
The incline neutral grip dumbbell press is a popular exercise that targets the upper chest, shoulders, and triceps. It is a variation of the traditional bench press and is performed on an incline bench with neutral grip dumbbells. This exercise is suitable for both beginners and advanced lifters as it is easy to learn and can be adjusted to accommodate different fitness levels.
How to Perform Incline Neutral Grip Dumbbell Press
Before starting the exercise, ensure that you have an incline bench and a pair of neutral grip dumbbells. Here are the steps to follow:
- Set the incline bench to a 30-45 degree angle.
- Lie down on the bench with your feet firmly planted on the ground.
- Grasp the dumbbells with your palms facing each other, and raise them to the starting position above your chest, with your arms fully extended.
- Lower the dumbbells slowly to your chest, keeping your elbows tucked in and your shoulders relaxed.
- Pause briefly, then push the dumbbells back up to the starting position, exhaling as you do so.
- Repeat the exercise for the desired number of repetitions.

Benefits of Incline Neutral Grip Dumbbell Press
The incline neutral grip dumbbell press offers several benefits, including:
- Targets the upper chest muscles which are often neglected in traditional bench press exercises.
- Strengthens the shoulders and triceps, which are important for pushing movements such as the bench press, overhead press, and push-ups.
- Improves overall chest development, giving the chest a fuller and more defined look.
- Allows for greater range of motion compared to the traditional bench press, which can help to reduce the risk of shoulder injuries.
- Can be adjusted to suit different fitness levels, making it suitable for both beginners and advanced lifters.

Tips for Performing Incline Neutral Grip Dumbbell Press
Here are some tips to help you get the most out of your incline neutral grip dumbbell press:
- Choose a weight that allows you to perform the exercise with good form and without straining.
- Keep your elbows tucked in and your shoulders relaxed throughout the exercise.
- Breathe naturally and avoid holding your breath.
- Engage your core muscles to help stabilise your body during the exercise.
- Perform the exercise in a slow and controlled manner, focusing on the contraction of your chest muscles.
- Experiment with different angles on the incline bench to target different areas of your chest muscles.

Variations of Incline Neutral Grip Dumbbell Press
Here are some variations of the incline neutral grip dumbbell press that you can try:
- Incline dumbbell flyes - this exercise targets the upper chest muscles and can be performed with lighter weights.
- Incline barbell press - this exercise is similar to the incline neutral grip dumbbell press but uses a barbell instead of dumbbells.
- Incline push-ups - this exercise is a bodyweight alternative to the incline neutral grip dumbbell press and can be performed anywhere.

Conclusion
The incline neutral grip dumbbell press is an effective exercise for targeting the upper chest, shoulders, and triceps. It offers several benefits and can be adjusted to suit different fitness levels. By following the proper form and technique, you can get the most out of this exercise and achieve your fitness goals.
Related video of Incline Neutral Grip Dumbbell Press: A Comprehensive Guide

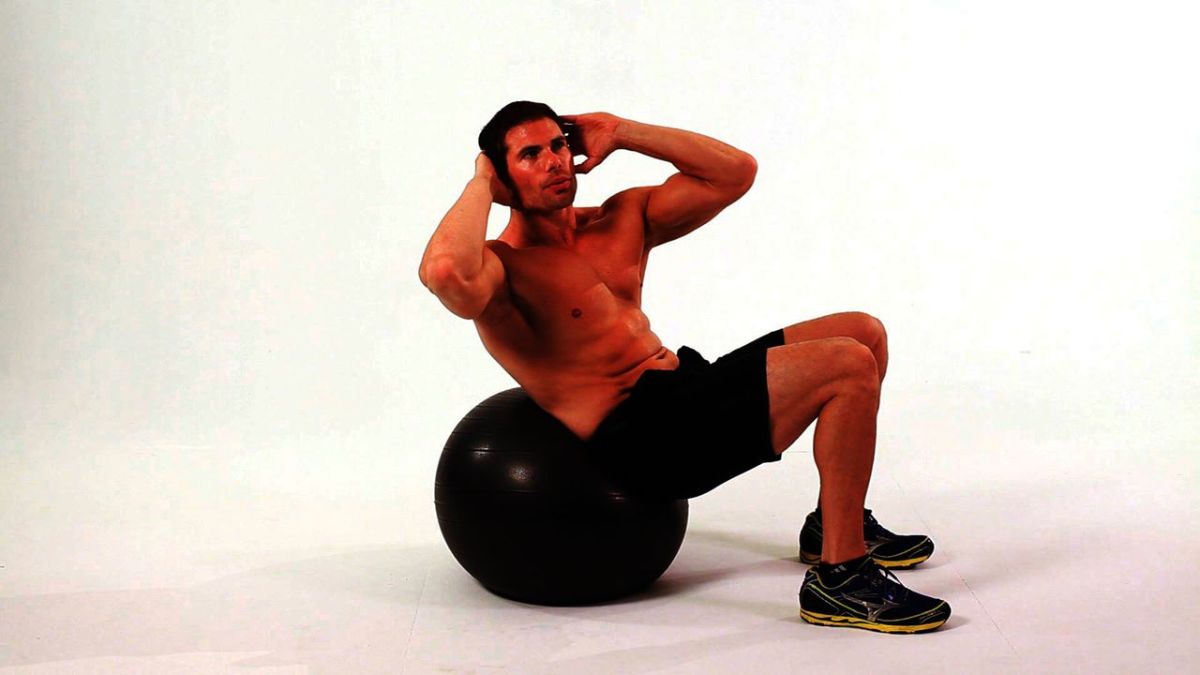
If you're looking for an effective workout that targets your core muscles, Swiss ball oblique crunches are a great exercise to try. This move is designed to strengthen your oblique muscles, which are located on the sides of your abdomen, while also working your abs and lower back. In this article, we'll take a closer look at how to perform Swiss ball oblique crunches, as well as some of the benefits of incorporating this exercise into your fitness routine.
What are Swiss Ball Oblique Crunches?

Swiss ball oblique crunches are a type of crunch exercise that utilizes a Swiss ball, also known as an exercise ball or stability ball. The exercise involves lying on the ball with your lower back supported, then lifting your upper body off the ball and twisting to one side. This movement targets your oblique muscles, which are responsible for rotating and bending your torso. By engaging these muscles, you can improve your overall core strength and stability.
How to Perform Swiss Ball Oblique Crunches
Here's a step-by-step guide to performing Swiss ball oblique crunches:
- Start by sitting on the Swiss ball and walking your feet forward until your lower back is resting on the ball.
- Place your hands behind your head and lift your upper body off the ball, keeping your lower back in contact with the ball.
- As you lift your upper body, twist to one side and bring your elbow towards your opposite knee.
- Lower your upper body back down to the starting position, then repeat on the other side.
- Continue alternating sides for the desired number of reps.

It's important to maintain proper form throughout the exercise to ensure that you're targeting the correct muscles and avoiding injury. Keep your abs engaged and your lower back in contact with the ball throughout the movement. You should also avoid using momentum to complete the twist, instead focusing on using your oblique muscles to rotate your torso.
Benefits of Swiss Ball Oblique Crunches
Swiss ball oblique crunches offer a number of benefits for your core muscles and overall fitness. Here are just a few:
- Improved core strength: By targeting your oblique muscles, Swiss ball oblique crunches can help improve your overall core strength and stability.
- Better posture: Strengthening your core muscles can also help improve your posture, reducing your risk of back pain and other injuries.
- Increased flexibility: The twisting motion involved in Swiss ball oblique crunches can help increase your overall flexibility and range of motion.
- Low-impact exercise: Because Swiss ball oblique crunches are a low-impact exercise, they're a great option for people with joint pain or other injuries.
Incorporating Swiss Ball Oblique Crunches into Your Workout
If you're interested in incorporating Swiss ball oblique crunches into your workout routine, start by performing a few sets of 10-12 reps on each side. As you become more comfortable with the exercise, you can increase the number of reps or add weights to make the move more challenging.
It's also important to remember that Swiss ball oblique crunches are just one exercise in a well-rounded fitness routine. Be sure to also include other core exercises, as well as strength training and cardio, to achieve optimal results.
Conclusion
If you're looking for an effective way to strengthen your core muscles and improve your overall fitness, Swiss ball oblique crunches are a great exercise to try. By targeting your oblique muscles, this move can help improve your core strength, posture, and flexibility. Incorporate Swiss ball oblique crunches into your workout routine and watch as your core muscles become stronger and more defined!
Related video of Swiss Ball Oblique Crunches: The Ultimate Core Workout
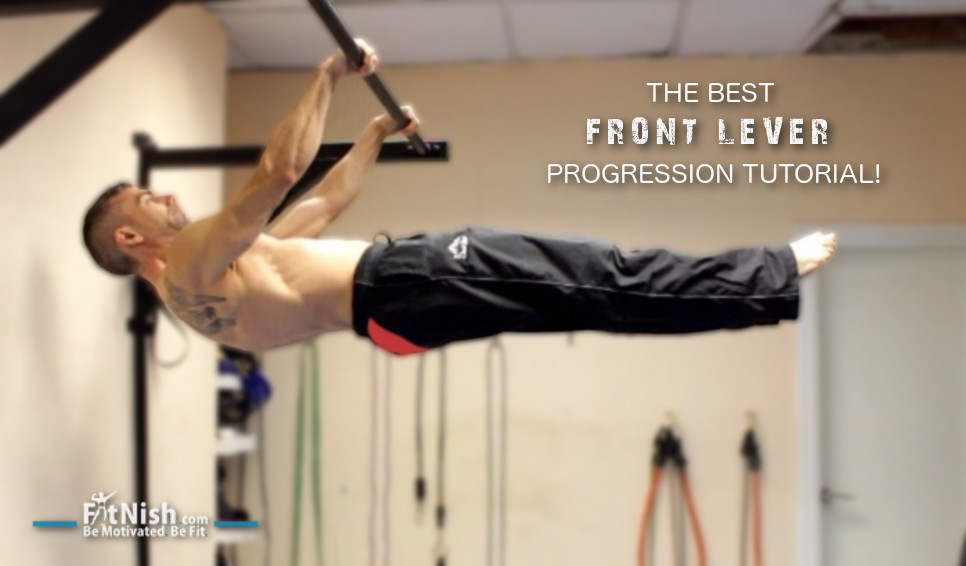
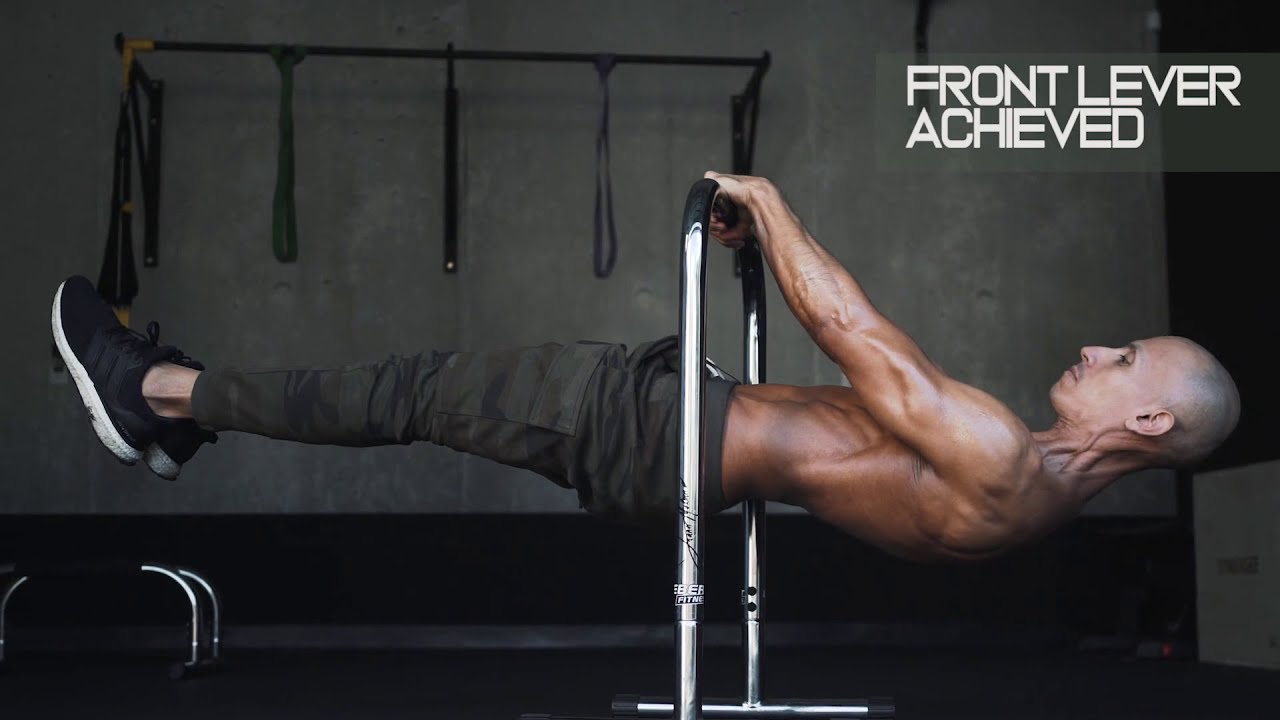
The front lever is an advanced calisthenics exercise that requires a tremendous amount of strength, control, and balance. It is a static hold that involves hanging horizontally from a bar with the body parallel to the ground. This exercise works the entire body, particularly the core, back, and shoulder muscles.

Core Muscles
The core muscles are the main muscles involved in the front lever. These muscles include the rectus abdominis, obliques, and the transversus abdominis. The front lever requires a strong core to maintain the horizontal position and prevent the body from sagging down towards the ground.

Back Muscles
The back muscles are also heavily involved in the front lever. These muscles include the latissimus dorsi, rhomboids, and the erector spinae. The front lever requires a strong back to maintain the body's horizontal position and prevent the body from rotating.
Shoulder Muscles
The shoulder muscles are also engaged in the front lever. These muscles include the deltoids, rotator cuff muscles, and the serratus anterior. The front lever requires strong shoulder muscles to maintain the body's horizontal position and prevent the arms from sagging down towards the ground.

Arm and Grip Muscles
The arm and grip muscles are also involved in the front lever. These muscles include the biceps, triceps, forearm flexors, and extensors. The front lever requires a strong grip to maintain the body's horizontal position and prevent the arms from slipping off the bar.
Benefits of Front Lever
The front lever is a challenging exercise that offers several benefits. It increases upper body strength, improves core stability, enhances grip strength, and improves overall body control and coordination.

How to Perform Front Lever
The front lever is an advanced exercise that requires a lot of strength and practice. To perform the front lever, follow these steps:
- Hang from a pull-up bar with an overhand grip.
- Engage your core and lift your legs up to a horizontal position.
- Slowly lower your upper body until it is parallel to the ground.
- Hold this position for as long as possible.
- Slowly release and lower your legs back down.
It is essential to practice proper form and technique while performing the front lever. Beginners can start by practicing progressions such as the tuck lever or advanced tuck lever before attempting the full front lever.

Common Mistakes to Avoid
There are several common mistakes to avoid while performing the front lever. These mistakes include:
- Not engaging the core muscles properly
- Allowing the body to sag or rotate
- Not maintaining proper form and technique
- Trying to perform the exercise too quickly without proper preparation and practice
It is essential to take your time and practice proper form and technique while performing the front lever to avoid injury and achieve the best results.

Conclusion
The front lever is an advanced calisthenics exercise that works the entire body, particularly the core, back, and shoulder muscles. It offers several benefits, including increased upper body strength, improved core stability, enhanced grip strength, and improved overall body control and coordination. It is essential to practice proper form and technique while performing the front lever and avoid common mistakes to achieve the best results.
Related video of Front Lever Muscles Worked
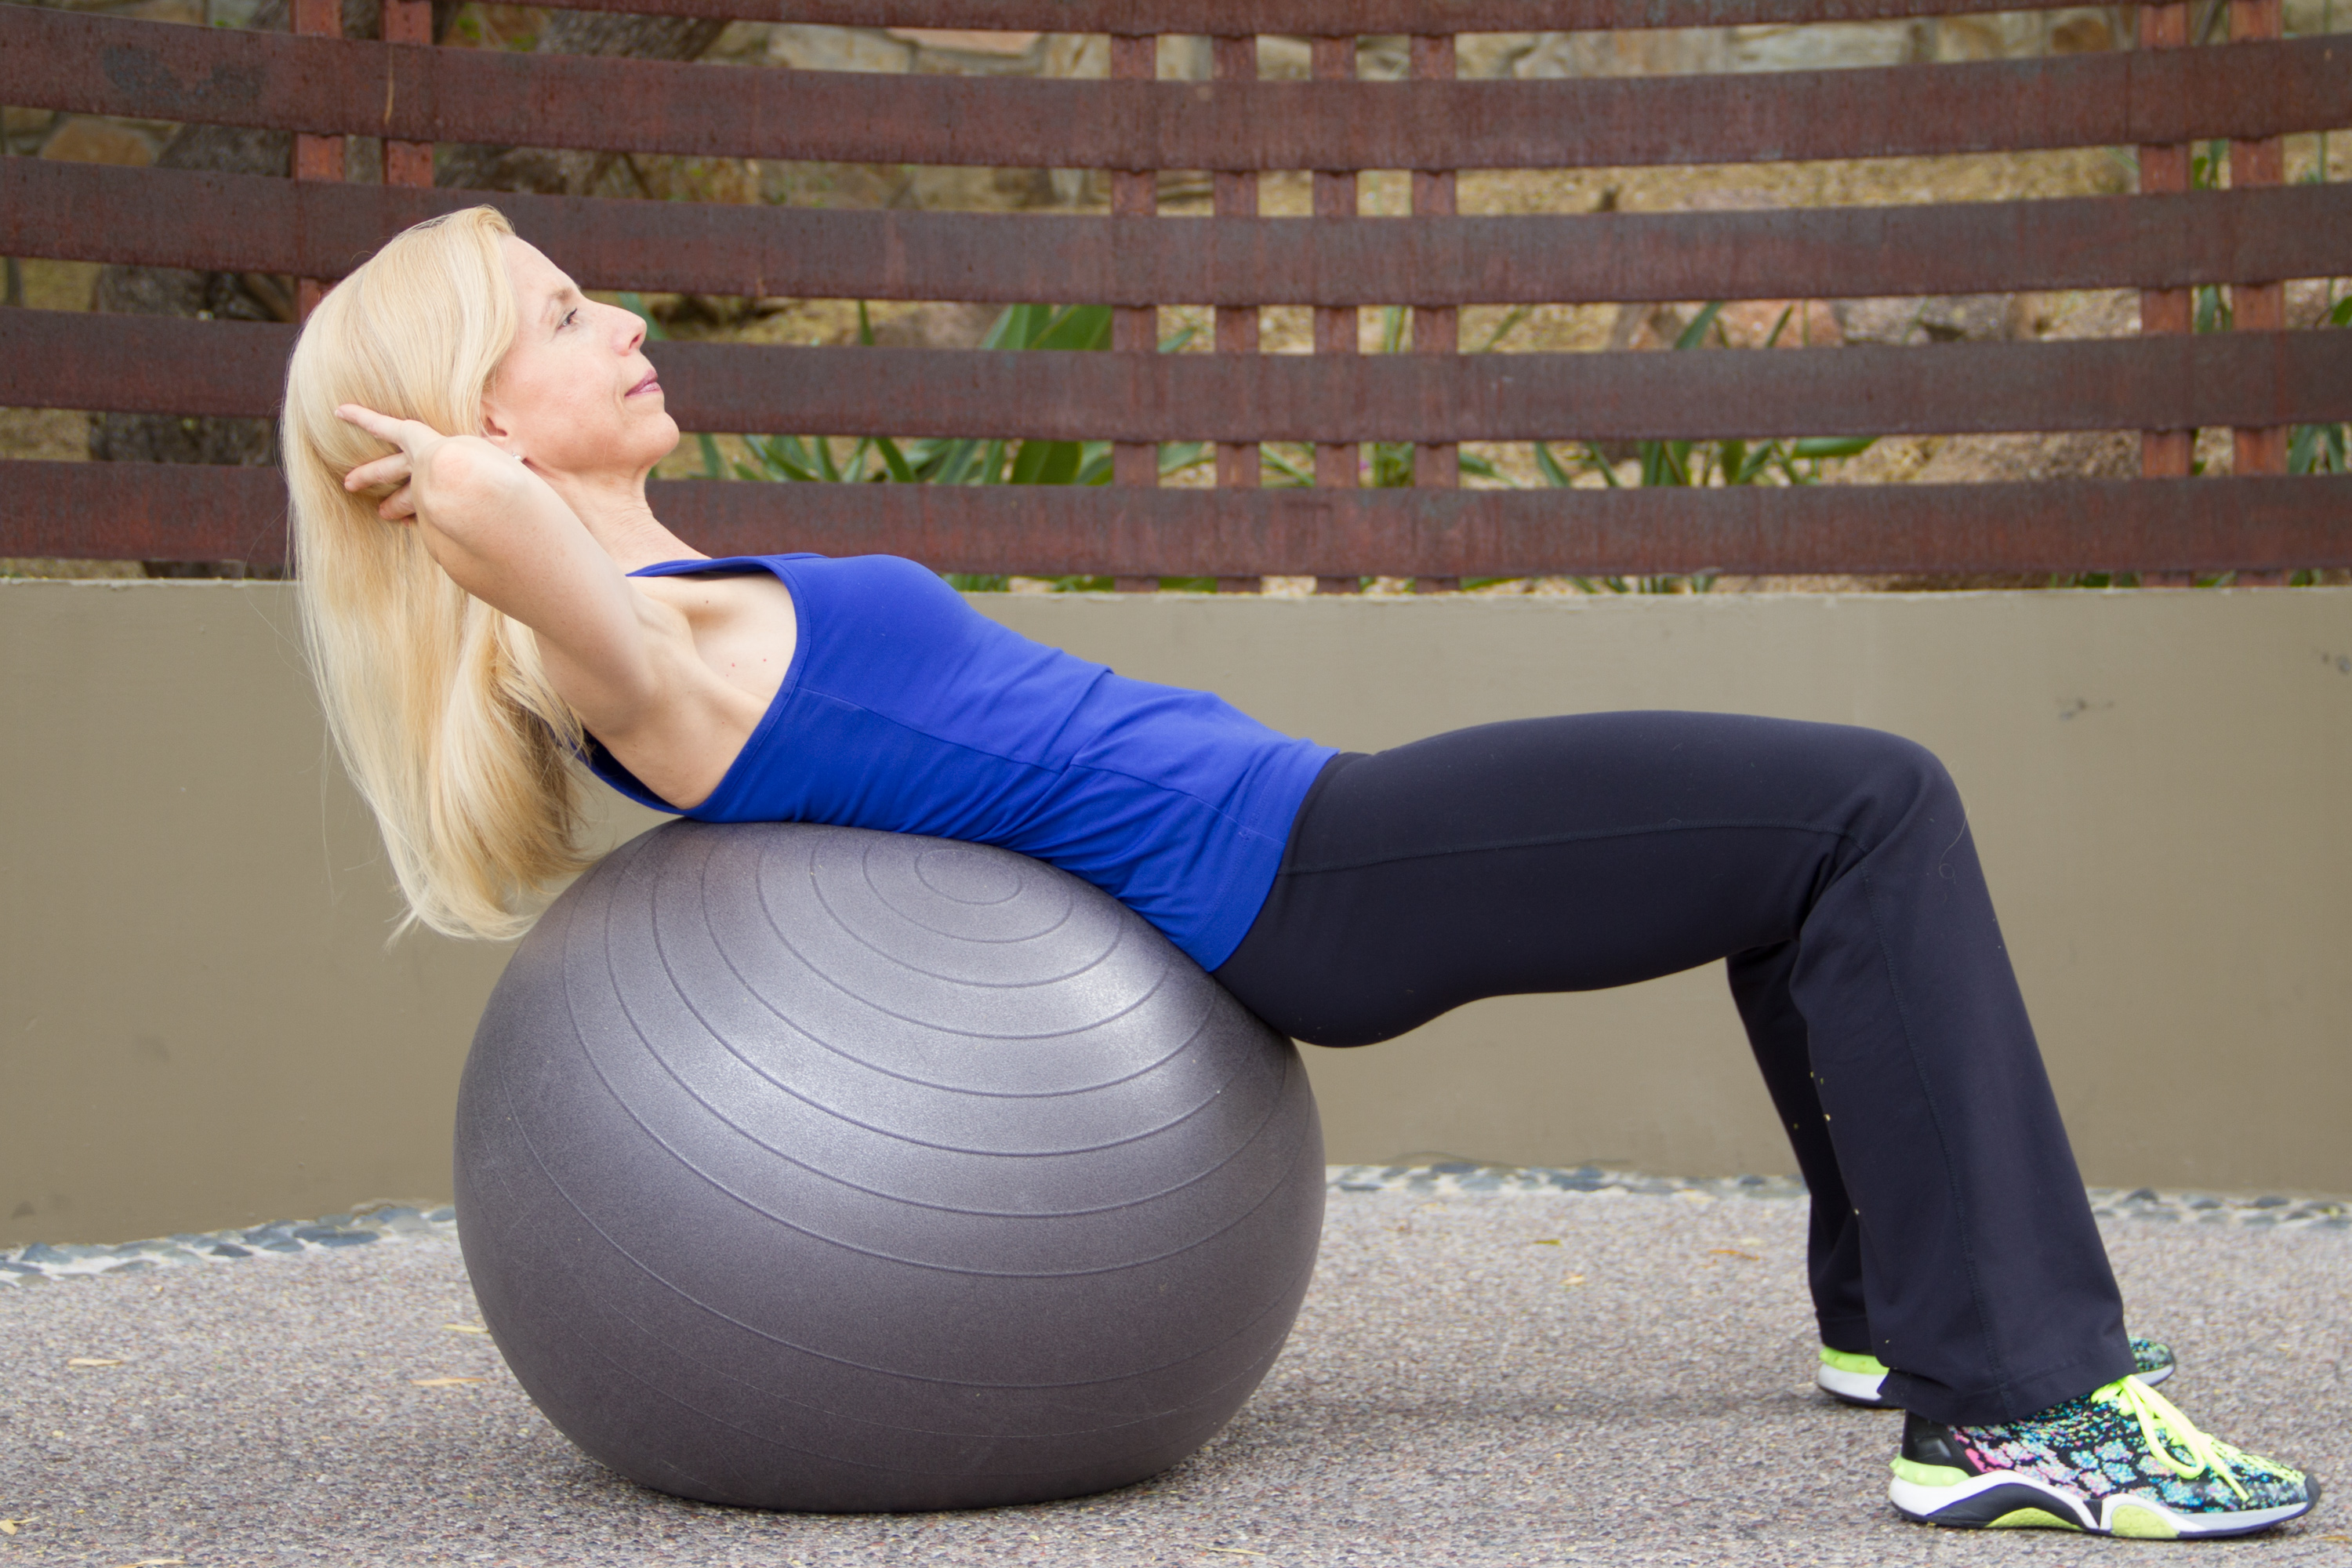
Exercising is essential for maintaining a healthy body and mind. When it comes to strengthening the back, stability ball exercises can provide an effective workout. The stability ball is a versatile piece of equipment that can be used to target different muscle groups in the back. In this article, we will explore some of the best back exercises with a stability ball.
1. Back Extension

The back extension is an excellent exercise for strengthening the lower back. To perform this exercise, lie face down on the stability ball with your hands behind your head. Slowly lift your upper body off the ball, keeping your back straight. Hold for a few seconds and then lower your body back down. Repeat for several reps.
2. Superman

The Superman exercise targets the muscles in the lower and upper back. To perform this exercise, lie face down on the stability ball with your arms and legs extended. Slowly lift your arms and legs off the ball, keeping your back straight. Hold for a few seconds and then lower your arms and legs back down. Repeat for several reps.
3. Bridge

The bridge exercise is an excellent way to strengthen the muscles in the lower back and glutes. To perform this exercise, lie face up on the stability ball with your feet flat on the floor. Slowly lift your hips off the ball, keeping your back straight. Hold for a few seconds and then lower your hips back down. Repeat for several reps.
4. Plank
The plank is a popular exercise that targets the core muscles, including the muscles in the back. To perform this exercise, place your forearms on the stability ball and extend your legs behind you. Keep your back straight and hold this position for several seconds. Repeat for several reps.
5. Side Plank

The side plank is an excellent exercise for strengthening the oblique muscles in the back. To perform this exercise, lie on your side with your elbow on the stability ball and your legs extended. Lift your hips off the ground, keeping your back straight. Hold for a few seconds and then lower your hips back down. Repeat for several reps on each side.
6. Wall Angels

Wall angels are a great exercise for improving posture and strengthening the upper back muscles. To perform this exercise, stand with your back against a wall and hold the stability ball between your hands. Slowly raise your arms up and down while keeping your back against the wall. Repeat for several reps.
7. Cobra Stretch

The cobra stretch is an effective exercise for stretching the muscles in the back. To perform this exercise, lie face down on the stability ball with your hands on the floor. Slowly lift your upper body off the ball, keeping your arms straight. Hold for a few seconds and then lower your body back down. Repeat for several reps.
Conclusion
Back exercises with a stability ball can help strengthen the muscles in the back, improve posture, and reduce the risk of injury. Incorporate these exercises into your workout routine for a stronger and healthier back.
Related video of Back Exercises With Stability Ball

Cable chest flyes are a popular exercise that targets the chest muscles. It is an isolation exercise that helps to build strength and size in the chest muscles. In this article, we will discuss the muscles worked during cable chest flyes, how to perform the exercise, and some variations to try out.
Muscles Worked

The primary muscles worked during cable chest flyes are the pectoralis major and minor muscles, which are the muscles that make up the chest. These muscles are responsible for adduction and flexion of the arm, which means they are used when you bring your arms together in front of your body.
In addition to the chest muscles, the anterior deltoids, or front shoulder muscles, are also activated during cable chest flyes. This is because the movement involves bringing the arms across the body, which requires the use of the front shoulder muscles.
Cable chest flyes also work the serratus anterior muscles, which are located along the sides of the chest. These muscles help to stabilize the scapulae, or shoulder blades, during the movement.
How to Perform Cable Chest Flyes

To perform cable chest flyes, follow these steps:
- Attach two D-handles to the high pulleys on a cable machine.
- Stand in the center of the cable machine and grasp one handle in each hand.
- Step forward and lean slightly forward with your arms extended out to the sides at shoulder height.
- Slowly bring your arms together in front of your body, keeping your elbows slightly bent and your shoulders down and back.
- Squeeze your chest muscles at the end of the movement, then slowly return to the starting position.
- Repeat for the desired number of reps.
Variations
There are several variations of cable chest flyes that you can try to target different areas of the chest:
- Incline cable chest flyes - this variation targets the upper chest muscles.
- Decline cable chest flyes - this variation targets the lower chest muscles.
- Single-arm cable chest flyes - this variation helps to correct muscle imbalances between the left and right sides of the body.
Tips for Cable Chest Flyes
Here are some tips to keep in mind when performing cable chest flyes:
- Keep your elbows slightly bent throughout the movement to reduce stress on your joints.
- Focus on squeezing your chest muscles at the end of the movement to get the most out of the exercise.
- Use a weight that allows you to maintain proper form throughout the exercise.
- Control the movement and avoid swinging your arms.
Conclusion
Cable chest flyes are a great exercise for building strength and size in the chest muscles. By targeting the pectoralis major and minor muscles, as well as the anterior deltoids and serratus anterior muscles, cable chest flyes can help to improve your overall upper body strength and aesthetics. Try out the variations and tips mentioned in this article to get the most out of your cable chest flyes.
Related video of Cable Chest Flyes Muscles Worked

If you're looking to tone your hips, you'll need to exercise the muscles in that area. The three muscles that make up the hip area are the gluteus medius, gluteus minimus, and tensor fascia latae. These three muscles work together to help you lift your leg to the side and rotate your hips. By exercising these muscles, you can improve your balance, stability, and overall leg strength. Here are three hip exercises that you can do to tone your hips.
1. Side-Lying Leg Lifts

Side-lying leg lifts are an excellent exercise for toning your hips. To do this exercise, lie on your side with your legs straight. Slowly lift your top leg as high as you can without moving your hips. Hold this position for two seconds, then lower your leg back down. Repeat this exercise 10 times on each side.
2. Clamshells

Clamshells are another great exercise for working your hip muscles. To do this exercise, lie on your side with your knees bent at a 90-degree angle. Keep your feet together and lift your top knee as high as you can without moving your pelvis. Hold this position for two seconds, then lower your knee back down. Repeat this exercise 10 times on each side.
3. Fire Hydrants

Fire hydrants are a fun exercise that can help tone your hips. To do this exercise, get on all fours with your hands directly under your shoulders and your knees directly under your hips. Lift your knee out to the side, keeping your knee bent at a 90-degree angle. Hold this position for two seconds, then lower your knee back down. Repeat this exercise 10 times on each side.
Conclusion
By incorporating these three hip exercises into your workout routine, you can tone your hips and improve your overall leg strength. Remember to start slowly and gradually increase the number of repetitions as you get stronger. With consistent exercise and a healthy diet, you can achieve toned and strong hips.
Related video of 3 Way Hip Exercise
Fitness enthusiasts are constantly on the lookout for new and challenging exercises that can help them build strength and improve their physique. If you're one of those people, then you might want to consider adding the Kettlebell RDL Single Leg to your routine. This exercise is a great way to target your hamstrings, glutes, and lower back, all while improving your balance and stability. In this article, we'll take a closer look at how to perform the Kettlebell RDL Single Leg, its benefits, and some tips to help you get the most out of it.
What is the Kettlebell RDL Single Leg?

The Kettlebell RDL Single Leg is a variation of the traditional Romanian deadlift (RDL) that involves using a kettlebell and performing the exercise on one leg. The exercise targets the hamstrings, glutes, and lower back, while also challenging your balance and stability. To perform the exercise, you'll need a kettlebell and a flat surface to stand on.
How to Perform the Kettlebell RDL Single Leg
Here's a step-by-step guide on how to perform the Kettlebell RDL Single Leg:
- Stand with your feet hip-width apart and hold a kettlebell in your right hand.
- Lift your left foot off the ground and balance on your right foot.
- Keeping your back straight, hinge forward at the hips and lower the kettlebell towards the ground.
- Lower your body until your torso is parallel to the ground, and your left leg is extended behind you.
- Pause for a second and then slowly return to the starting position.
- Repeat for the desired number of reps before switching to your left leg.
Benefits of the Kettlebell RDL Single Leg

The Kettlebell RDL Single Leg offers a wide range of benefits that can help you improve your overall fitness level. Here are some of the key benefits:
- Targets multiple muscle groups: The exercise targets your hamstrings, glutes, and lower back, all of which are important muscles for functional movements like squatting, jumping, and running.
- Improves balance and stability: Since you're performing the exercise on one leg, it challenges your balance and stability, which can help improve your overall athleticism.
- Builds strength and power: The exercise requires you to lift and lower a heavy kettlebell, which can help you build strength and power in your lower body.
- Prevents injury: By targeting your posterior chain muscles, the exercise can help prevent injuries in your lower back, hips, and knees.
Tips to Get the Most Out of the Kettlebell RDL Single Leg

If you want to get the most out of the Kettlebell RDL Single Leg, here are some tips to keep in mind:
- Start with a light kettlebell: If you're new to the exercise, start with a light kettlebell and focus on perfecting your form before increasing the weight.
- Keep your core tight: To maintain proper form and prevent injury, engage your core throughout the exercise.
- Focus on balance and stability: Since the exercise is performed on one leg, focus on maintaining your balance and stability throughout the movement.
- Use a full range of motion: Lower the kettlebell as far as you can without rounding your back, and then return to the starting position.
Conclusion
The Kettlebell RDL Single Leg is a challenging and effective exercise that can help you build strength, improve your balance and stability, and prevent injuries. By following the steps outlined in this article and incorporating the exercise into your routine, you can take your fitness to the next level and achieve your goals.
Related video of Kettlebell RDL Single Leg: The Ultimate Leg-Strengthening Exercise

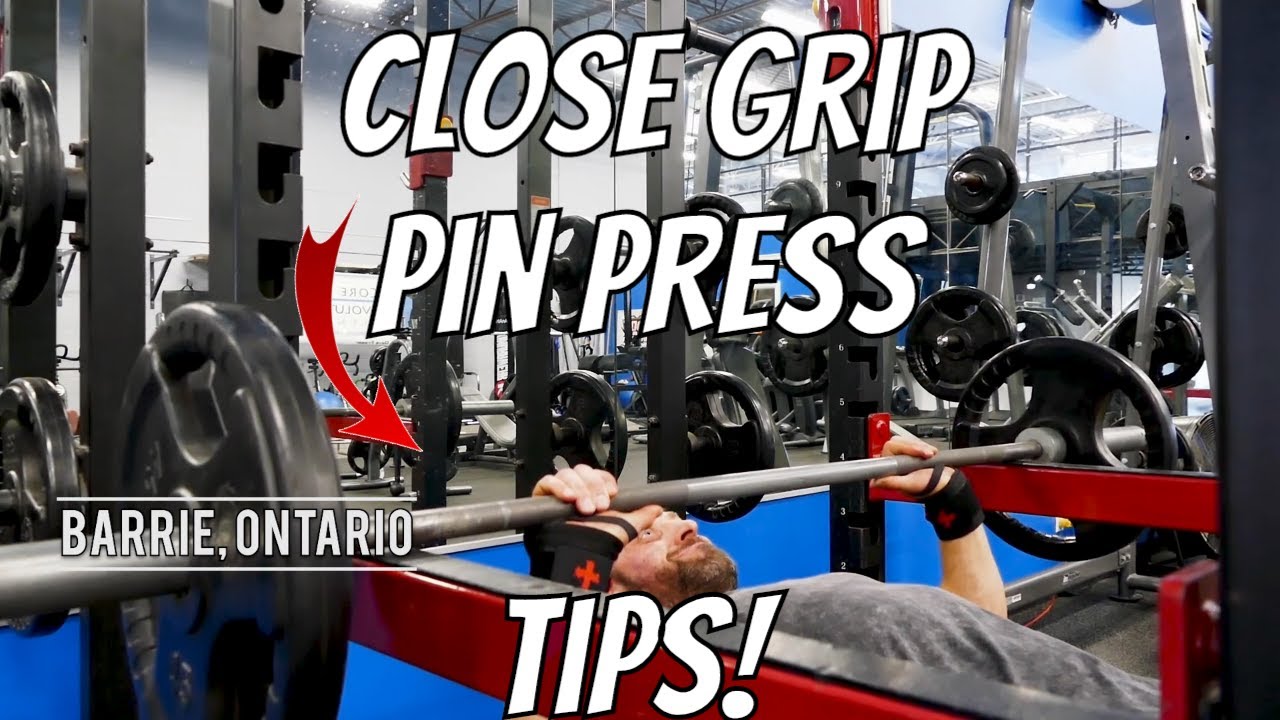
If you're looking to improve your bench press, you may want to consider incorporating the close grip pin press into your training program. This exercise targets the triceps, which are crucial for lockout strength in the bench press. In this article, we will discuss everything you need to know about the close grip pin press, including proper form, benefits, and variations.
What is the Close Grip Pin Press?

The close grip pin press is a variation of the bench press that involves using a close grip and starting the lift from the bottom position. Instead of lowering the bar to your chest, you'll lower it to pins or safety bars set at chest level. This forces you to pause and reset before pressing the weight back up.
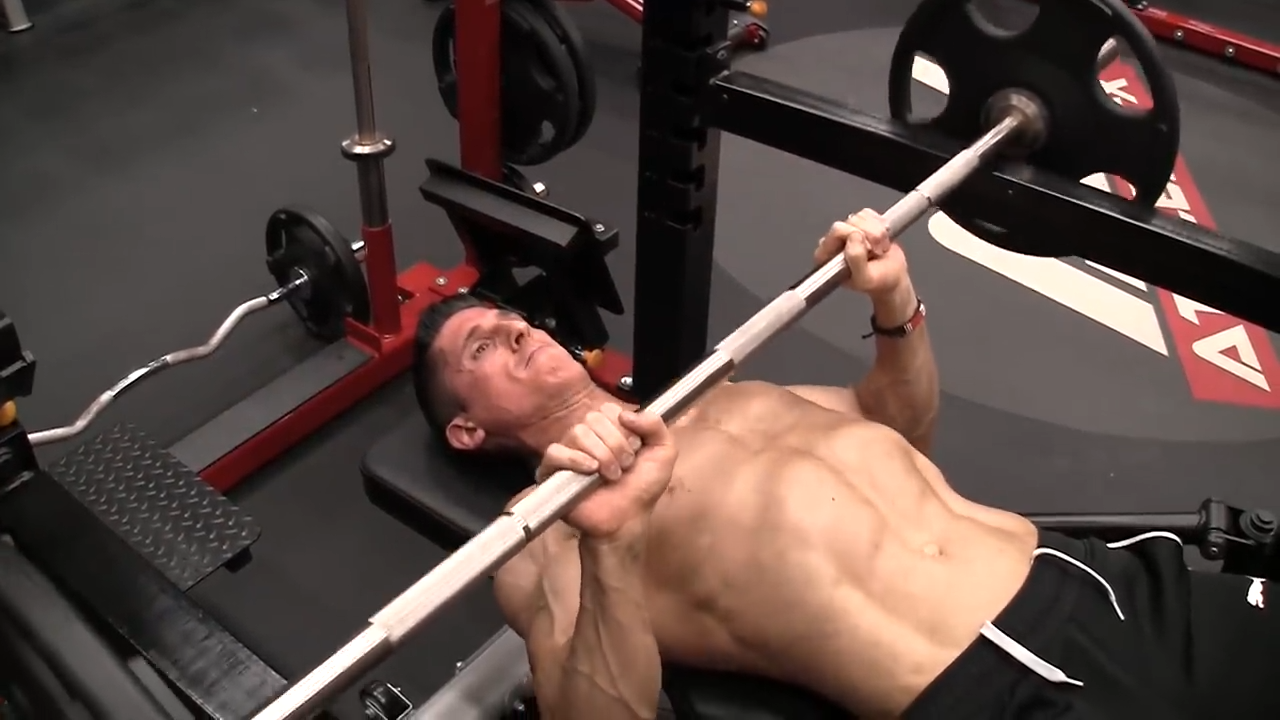
How to Perform the Close Grip Pin Press
Follow these steps to perform the close grip pin press:
- Set the pins or safety bars in a power rack or squat rack at chest level.
- Lie down on the bench and position yourself underneath the bar.
- Grip the bar with your hands shoulder-width apart or slightly narrower.
- Lift the bar off the pins and lower it to your chest.
- Pause for a second or two, then press the bar back up to the starting position.
- Repeat for the desired number of reps.
It's important to keep your elbows tucked in and your upper arms close to your body throughout the lift. This will place more emphasis on your triceps and help prevent shoulder strain.
Benefits of the Close Grip Pin Press

The close grip pin press offers several benefits, including:
- Increased triceps strength: The close grip pin press places a greater emphasis on the triceps than the standard bench press, which can help improve lockout strength.
- Improved bench press performance: By targeting the triceps, the close grip pin press can help you increase your bench press numbers.
- Reduced shoulder strain: Tucking your elbows in during the lift can help reduce stress on your shoulders, making it a safer exercise for those with shoulder issues.
- Increased muscle activation: The pause at the bottom of the lift forces you to generate more force to get the weight moving, which can lead to increased muscle activation and growth.
Close Grip Pin Press Variations
Here are a few variations of the close grip pin press you can try:
Board Press
The board press involves placing a board on your chest and pressing the bar against it. This allows you to work on lockout strength while reducing the range of motion of the lift.
Close Grip Bench Press
The close grip bench press is similar to the close grip pin press, but you'll start the lift from the top position instead of the bottom. This can help you work on your initial drive and explosiveness.
Reverse Grip Bench Press

The reverse grip bench press involves using a reverse grip (palms facing towards you) instead of a traditional grip. This can place more emphasis on the upper chest and triceps.
Conclusion
The close grip pin press is a powerful exercise that can help you improve your bench press performance and build stronger triceps. By incorporating this exercise into your training program and using proper form, you can take your strength gains to the next level.
Related video of Close Grip Pin Press: A Comprehensive Guide to Boost Your Bench Press
Have you ever heard someone talk about giving or receiving a shoulder tap? It may sound like a strange term, but it's actually a common phrase used in various contexts. A shoulder tap can refer to a physical gesture, a social interaction, or even a law enforcement tactic. In this article, we'll explore what a shoulder tap is and how it's used in different situations.
Physical Gesture

As the name suggests, a shoulder tap can simply mean tapping someone on the shoulder. This physical gesture is often used to get someone's attention or to convey a message without speaking. For example, if you're in a noisy environment and want to ask someone a question, you may tap them on the shoulder to get their attention.
Shoulder taps can also be used as a form of greeting or acknowledgement. In some cultures, it's common to tap someone on the shoulder as a sign of respect or friendship. However, it's important to note that physical touch can be uncomfortable or inappropriate for some people, so it's always best to ask for consent before giving a shoulder tap.
Social Interaction

In a social context, a shoulder tap can refer to reaching out to someone for help or support. For example, if you're trying to network at a business event, you may give someone a shoulder tap to introduce yourself and start a conversation. Similarly, if you're going through a difficult time and need emotional support, you may reach out to a friend with a shoulder tap gesture.
However, it's important to be aware of the power dynamics at play in social interactions. If you're in a position of authority or privilege, a shoulder tap may come across as intrusive or condescending. Always consider how your actions may be perceived by others and strive to be respectful and empathetic.
Law Enforcement

In law enforcement, a shoulder tap is a tactic used to apprehend a suspect without causing a scene. If police officers have a warrant for someone's arrest but don't want to attract attention by making a public arrest, they may use a shoulder tap to discreetly inform the suspect of their warrant and take them into custody.
However, shoulder taps can also be controversial in law enforcement contexts. Some argue that they give police too much power to apprehend people without due process or oversight. Others argue that they can be used to target marginalized communities and violate civil liberties. As with any law enforcement tactic, it's important to consider the potential consequences and weigh the benefits against the risks.
Conclusion
Overall, a shoulder tap is a versatile phrase that can refer to a wide range of physical gestures, social interactions, and law enforcement tactics. While it may seem like a small gesture, it can have significant implications depending on the context in which it's used. By being aware of these different meanings and using shoulder taps respectfully and appropriately, we can foster positive communication and social interaction.
Related video of What Is A Shoulder Tap?

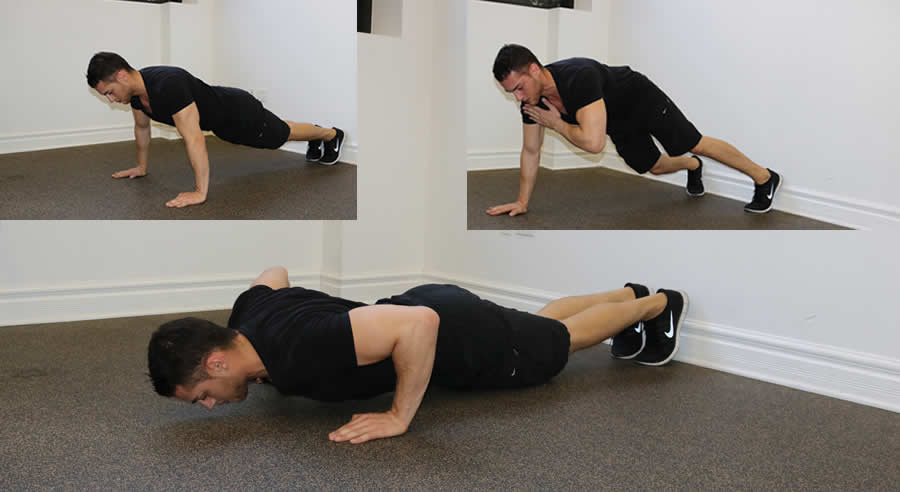
Side plank on knees is an excellent exercise that targets your core muscles, shoulders, and hips. It is a variation of the traditional side plank that is perfect for beginners or those who experience wrist pain when performing the standard version. In this article, we will discuss the benefits of side plank on knees, how to do it correctly, and some variations you can try.
Benefits of Side Plank On Knees

Side plank on knees is a great way to strengthen your core muscles, which are essential for maintaining proper posture, stability, and balance. It targets your oblique muscles, which run along the sides of your abdomen, and your transverse abdominis, which are the deep muscles that wrap around your spine. By strengthening these muscles, you can reduce the risk of injury and improve your athletic performance.
Side plank on knees also targets your shoulders and hips, which are often neglected in traditional ab exercises. It can help improve your shoulder stability, which is crucial for overhead movements like lifting weights or throwing a ball. It also strengthens your hip abductors, which are the muscles that move your legs away from your body. Strong hip abductors can help improve your balance and prevent knee and hip injuries.
How to Do Side Plank On Knees

To do side plank on knees, follow these steps:
- Start by kneeling on the floor with your knees hip-width apart.
- Place your left hand on the floor directly under your left shoulder.
- Extend your right leg out to the side and place your right foot on the floor in front of your left knee.
- Engage your core and lift your hips off the floor, creating a straight line from your head to your knees.
- Hold this position for 30 seconds to 1 minute.
- Lower your hips back to the floor and switch sides.
Make sure to keep your elbow straight and your shoulder blades pulled down and back. Keep your hips lifted throughout the exercise and breathe deeply.
Variations of Side Plank On Knees

Once you have mastered the basic side plank on knees, you can try some variations to make the exercise more challenging:
- Thread the needle: While in side plank on knees, reach your top arm under your body and twist your torso as you reach behind you. Return to the starting position and repeat for 10-12 reps before switching sides.
- Leg lift: While in side plank on knees, lift your top leg and hold for a few seconds before lowering it back down. Repeat for 10-12 reps before switching sides.
- Full side plank: Once you feel comfortable with side plank on knees, you can try the full side plank by extending both legs and balancing on the sides of your feet instead of your knees.
Conclusion
Side plank on knees is a great exercise that targets your core muscles, shoulders, and hips. It is an excellent alternative to the traditional side plank and can be done by beginners or those who experience wrist pain. By incorporating side plank on knees into your workout routine and trying some variations, you can improve your posture, stability, and balance while reducing the risk of injury.
Related video of Get Fit with Side Plank On Knees
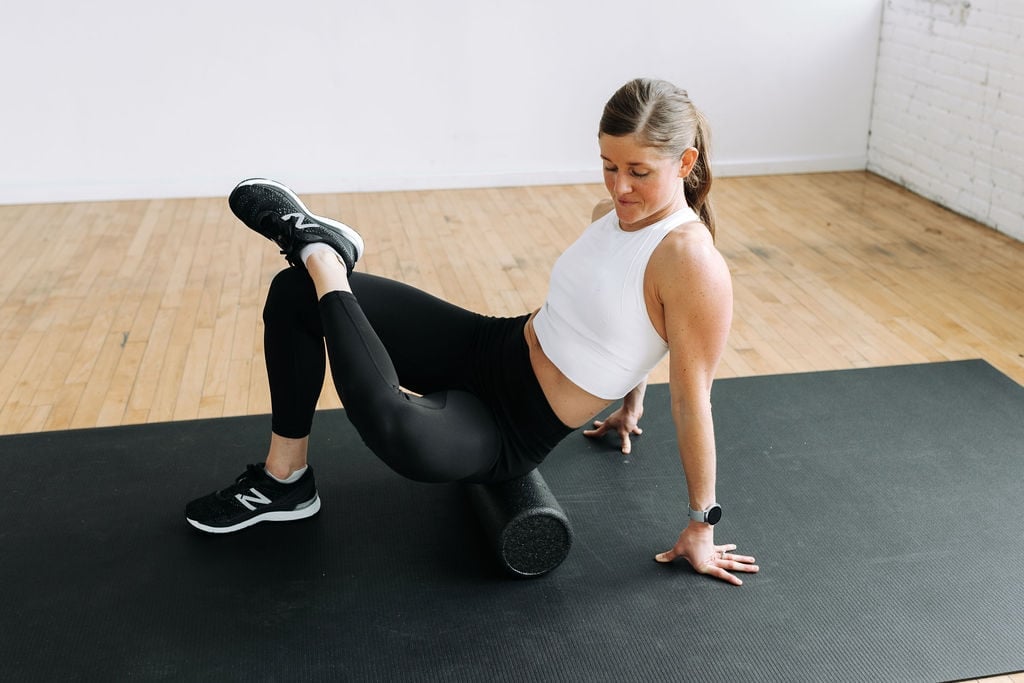
Foam rolling is a self-myofascial release technique that has become popular among athletes and fitness enthusiasts. It involves using a foam roller to apply pressure to the muscles, aiding in the release of tension and knots. Foam rolling can help improve range of motion, flexibility, and reduce muscle soreness. In this article, we will discuss how to foam roll the glutes, one of the largest muscle groups in the body.
Why Foam Roll The Glutes?

The glutes consist of three muscles: the gluteus maximus, gluteus medius, and gluteus minimus. These muscles play a significant role in hip extension, rotation, and stabilization. Tightness in the glutes can lead to lower back pain, hip pain, and even knee pain. Foam rolling the glutes can help reduce tension and improve mobility in these muscles.
How To Foam Roll The Glutes?

To foam roll the glutes, follow these steps:
- Place the foam roller on the ground and sit on it with your knees bent and feet flat on the floor.
- Cross your left ankle over your right knee and lean towards your left side to put pressure on your left glute.
- Roll up and down your left glute, pausing on any tender spots for 30 seconds.
- Repeat on the other side.
- You can also target the gluteus medius by rolling slightly towards the back of your hip and focusing on the area just below your hip bone.
Common Mistakes To Avoid

When foam rolling the glutes, it is important to avoid the following mistakes:
- Putting too much pressure on the lower back
- Rolling too quickly over tender spots
- Not breathing deeply and relaxing into the pressure
- Rolling over the IT band, which can cause pain and inflammation
Tips For Effective Foam Rolling
To get the most out of your foam rolling session, follow these tips:
- Roll slowly and deliberately, focusing on one area at a time
- Breathe deeply and relax into the pressure
- Use a grid-pattern foam roller for increased pressure and effectiveness
- Roll before and after workouts to warm up and cool down the muscles
- Drink plenty of water to aid in muscle recovery
Conclusion
Foam rolling the glutes is a simple and effective way to release tension and improve mobility in these large and important muscles. By following the steps outlined in this article, you can foam roll your glutes safely and effectively. Remember to avoid common mistakes and follow tips for effective foam rolling to get the most out of your session.