
When it comes to strength and endurance training, squats are among the most popular and effective exercises. Squats work out multiple muscle groups in the lower body, including the quadriceps, hamstrings, glutes, and calves. They also engage the core muscles and improve overall balance and stability. While many people incorporate squats into their workout routine, only a select few have attempted to break the world record for most squats in a row. In this article, we'll take a closer look at this impressive feat and the athletes who have achieved it.
The Current Record Holder

The current world record for most squats in a row is held by American fitness trainer Kendall Rye. On March 27, 2021, Rye completed an incredible 5,135 squats in a row without stopping. She broke the previous record of 4,708 squats, which was set by Australian athlete James Kearsley in 2015. Rye's feat took her a total of 4 hours and 20 minutes to complete, during which she burned an estimated 1,000 calories.
The Training Involved

Breaking the world record for most squats in a row requires an immense amount of preparation and training. Rye spent months leading up to her attempt working on her endurance and stamina, as well as her squat form and technique. She also enlisted the help of a nutritionist to ensure that she was fueling her body properly and getting enough protein, carbohydrates, and other essential nutrients.
During her training, Rye would often do multiple sets of squats, sometimes up to 500 squats in a single workout. She also incorporated other exercises to strengthen her legs and improve her cardiovascular fitness, such as lunges, leg presses, and stair-climbing. In addition, Rye practiced mental visualization techniques to help her stay focused and motivated during the grueling hours of squatting.
The Previous Record Holder

Before Kendall Rye broke the record, the title of most squats in a row belonged to James Kearsley from Australia. Kearsley set the previous record of 4,708 squats in 2015, which he completed in just over 8 hours. Kearsley's training involved a similar approach to Rye's, with a focus on endurance and stamina. He also used visualization techniques to help him stay focused and overcome the mental challenges of the feat.
Other Impressive Squatting Records

While the world record for most squats in a row is certainly impressive, it's not the only squatting record out there. There are also records for most squats in a certain amount of time, such as one hour or one minute. The current record for most squats in an hour is held by Japanese athlete Yuki Nakamura, who completed 2,919 squats in 60 minutes in 2015. Meanwhile, the record for most squats in one minute is held by American athlete Ashrita Furman, who completed 111 squats in 60 seconds in 2019.
The Benefits of Squats

Whether you're attempting to break a world record or just looking to improve your fitness level, squats offer a wide range of benefits. In addition to building strength and endurance in the lower body, squats can also help improve posture, increase flexibility, and enhance overall athletic performance. Squats also have functional benefits, such as making it easier to perform everyday activities like walking, climbing stairs, and carrying heavy objects.
Safety Considerations

While squats can be a highly effective exercise, it's important to practice proper form and technique to avoid injury. One common mistake people make when squatting is allowing their knees to collapse inward, which can put undue stress on the joints and increase the risk of injury. It's also important to avoid squatting too deeply if you have existing knee problems or other joint issues. If you're new to squatting or have any pre-existing health conditions, it's always a good idea to consult with a doctor or fitness professional before incorporating squats into your workout routine.
Conclusion
Breaking the world record for most squats in a row is a truly impressive feat that requires an enormous amount of dedication, preparation, and mental fortitude. Kendall Rye's recent accomplishment of completing 5,135 squats without stopping is a testament to the amazing capabilities of the human body. Whether or not you're attempting to break a record, incorporating squats into your fitness routine can offer a wide range of benefits for strength, endurance, and overall health.
Meta Description
Learn about the world record for most squats in a row, held by American fitness trainer Kendall Rye. Discover the training involved, impressive squatting records, benefits of squats, and safety considerations.
Meta Keywords
squats, world record, Kendall Rye, James Kearsley, training, benefits, safety considerations
Related video of Most Squats in a Row: A Record-Breaking Feat

Dumbbell squats are a type of strength training exercise that targets the lower body muscles, mainly the glutes, quadriceps, and hamstrings. This exercise involves using dumbbells to add resistance while performing squats. It is a highly effective exercise that can help you build strength, endurance, and muscle mass in your lower body.
Glutes

The glutes, or the buttocks muscles, are the primary muscle group targeted during dumbbell squats. This exercise can help you tone and strengthen your glutes, giving you a more lifted and toned appearance. Additionally, strong glutes can improve your posture, balance, and overall athletic performance.
Quadriceps

The quadriceps, or the muscles at the front of your thighs, are also targeted during dumbbell squats. This exercise can help you build strong, toned quads, which are essential for activities such as walking, running, and jumping. Additionally, strong quads can help you improve your balance and stability.
Hamstrings
The hamstrings, or the muscles at the back of your thighs, are also worked during dumbbell squats. This exercise can help you build strength and endurance in your hamstrings, which are essential for activities such as running and jumping. Additionally, strong hamstrings can help you improve your posture and reduce the risk of injury.
Core

The core muscles, including the abdominals, obliques, and lower back muscles, are also engaged during dumbbell squats. This exercise can help you improve your core strength, which is essential for maintaining good posture and balance. Additionally, a strong core can help you reduce the risk of back pain and injury.
Calves

The calves, or the muscles at the back of your lower legs, are also worked during dumbbell squats. This exercise can help you build strength and endurance in your calves, which are essential for activities such as walking, running, and jumping. Additionally, strong calves can help you improve your balance and stability.
Benefits of Dumbbell Squats

Dumbbell squats offer a wide range of benefits, including:
- Building lower body strength and muscle mass
- Improving balance and stability
- Toning and shaping the glutes, quads, and hamstrings
- Improving core strength and posture
- Reducing the risk of injury
- Burning calories and promoting weight loss
- Improving athletic performance
How to Perform Dumbbell Squats

To perform dumbbell squats:
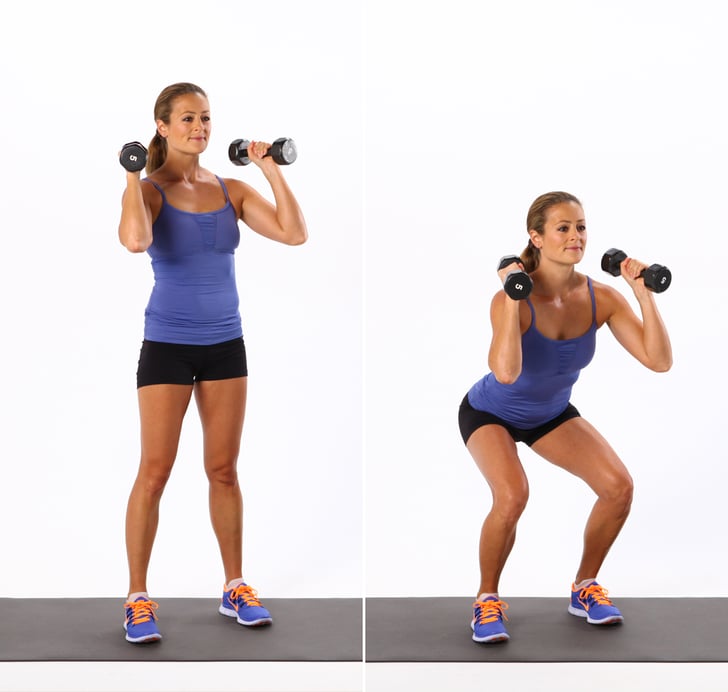
- Stand with your feet shoulder-width apart and hold a dumbbell in each hand, with your palms facing inward.
- Lower your body into a squat position by bending your knees and pushing your hips back.
- Keep your chest up and your back straight as you lower your body.
- Stop when your thighs are parallel to the ground, and then push through your heels to stand back up.
- Repeat for the desired number of reps.
Conclusion
Dumbbell squats are a highly effective exercise that can help you build strength, endurance, and muscle mass in your lower body. This exercise targets the glutes, quads, hamstrings, core, and calves, offering a wide range of benefits. By incorporating dumbbell squats into your workout routine, you can improve your overall fitness and achieve your fitness goals more quickly.
Related video of What Does Dumbbell Squat Work?
Wrist extensors are the muscles in your forearm that are responsible for extending your wrist and fingers. These muscles are important for many daily activities such as typing, writing, and gripping objects. Strengthening your wrist extensors can help improve your grip, reduce your risk of injury, and improve your overall wrist and hand function. Here are some exercises that you can do to strengthen your wrist extensors:
1. Wrist Extension with Dumbbells

To do this exercise, sit on a bench or chair with your forearm resting on a table or bench, palm facing down. Hold a dumbbell in your hand and slowly lift your wrist up toward the ceiling, then lower it back down. Repeat for 3 sets of 10-12 repetitions on each arm.
2. Wrist Extension with Resistance Band

Take a resistance band and wrap it around your fingers. Hold the other end of the band with your palm facing down. Slowly extend your wrist upward against the resistance of the band, then lower it back down. Repeat for 3 sets of 10-12 repetitions on each arm.
3. Reverse Wrist Curls

Hold a dumbbell in each hand with your palms facing down. Rest your forearms on a bench or table with your wrists hanging off the edge. Slowly lift your wrists up towards your body, then lower it back down. Repeat for 3 sets of 10-12 repetitions.
4. Finger Extensions
Sit on a bench or chair with your forearm resting on a table or bench, palm facing down. Hold a small weight or object (such as a tennis ball) in your hand. Slowly extend your fingers and hold for a few seconds, then release. Repeat for 3 sets of 10-12 repetitions on each hand.
5. Dumbbell Wrist Twists

Hold a light dumbbell in each hand with your palms facing up. Slowly twist your wrists from side to side, keeping your forearms stationary. Repeat for 3 sets of 10-12 repetitions on each arm.
6. Wrist Roller

Take a wrist roller and attach a light weight to it. Hold the roller with both hands and roll it up and down, keeping your forearms stationary. Repeat for 3 sets of 10-12 repetitions.
7. Reverse Grip Barbell Curls

Hold a barbell with an underhand grip (palms facing up). Slowly curl the barbell up towards your body, then lower it back down. Repeat for 3 sets of 10-12 repetitions.
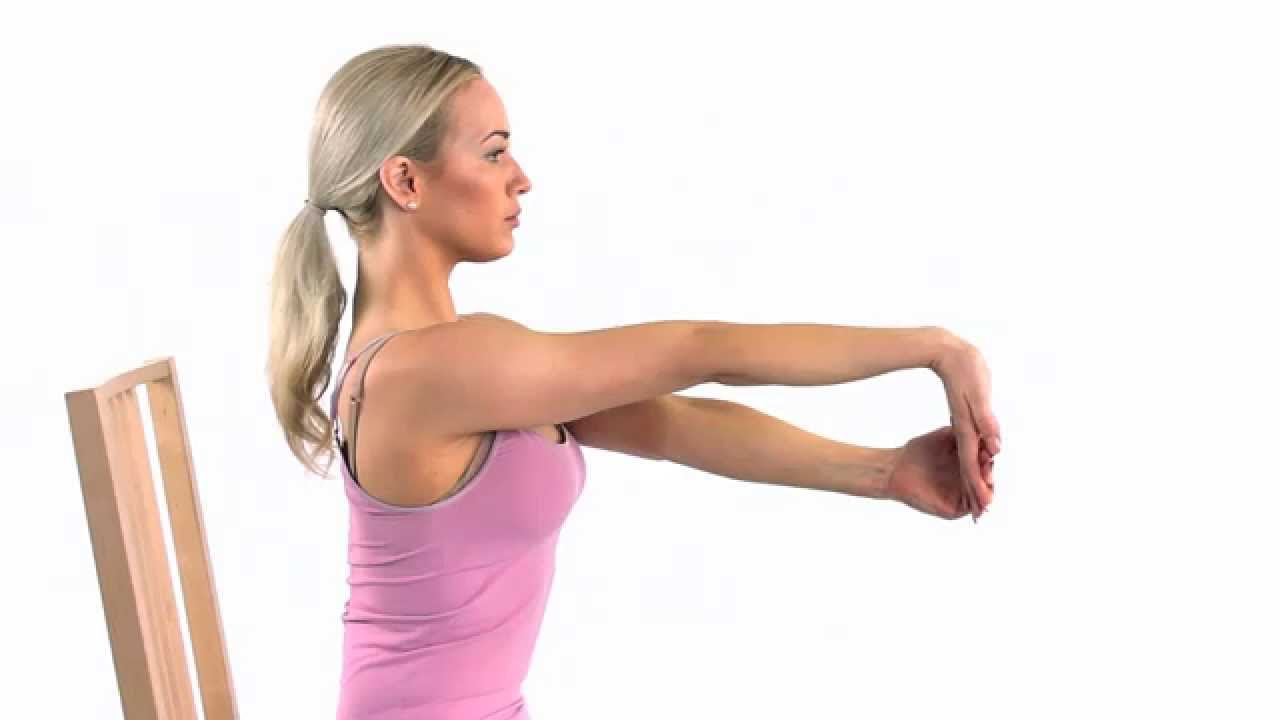
8. Wrist Flexor Stretch

Hold your arm out in front of you with your palm facing down. Use your other hand to gently pull your fingers towards your body until you feel a stretch in your wrist and forearm. Hold for 30 seconds, then release. Repeat on the other arm.
9. Wrist Extension Stretch
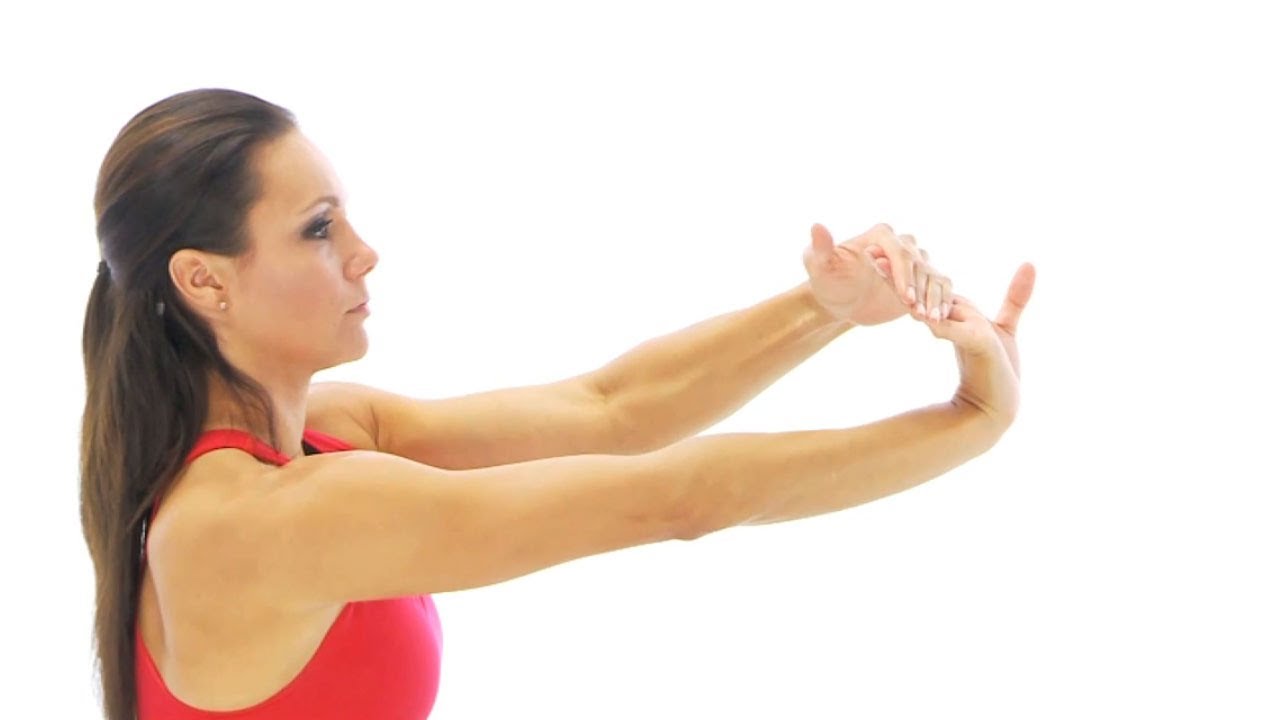
Hold your arm out in front of you with your palm facing up. Use your other hand to gently push your fingers towards the ground until you feel a stretch in your wrist and forearm. Hold for 30 seconds, then release. Repeat on the other arm.
10. Finger Stretches

Hold your hand out in front of you with your palm facing down. Use your other hand to gently pull each finger back towards your wrist until you feel a stretch in your fingers and hand. Hold for 15-20 seconds, then release. Repeat on the other hand.
11. Prayer Stretch

Hold your palms together in front of your chest with your fingers pointing up. Slowly lower your hands towards your waist until you feel a stretch in your wrists and forearms. Hold for 30 seconds, then release.
12. Wrist Circles

Hold your arm out in front of you with your palm facing down. Slowly rotate your wrist in a circular motion, first clockwise and then counterclockwise. Repeat for 10-15 repetitions on each arm.
13. Tennis Ball Squeeze

Hold a tennis ball or similar object in the palm of your hand. Squeeze the ball as tightly as you can, then release. Repeat for 3 sets of 10-12 repetitions on each hand.
14. Power Grip

Hold a hand gripper in your hand and squeeze it as tightly as you can. Hold for 5 seconds, then release. Repeat for 3 sets of 10-12 repetitions on each hand.
15. Rubber Band Finger Extensions

Take a rubber band and wrap it around your fingers. Slowly extend your fingers against the resistance of the band, then release. Repeat for 3 sets of 10-12 repetitions on each hand.
Related video of Exercises For Wrist Extensors

If you're looking to tone your abs, kettle bell ab workouts are a great way to do it. Kettle bells are a versatile piece of equipment that can be used in a variety of ways to target your core muscles. In this article, we'll take a look at some of the best kettle bell ab exercises you can do to get the results you want.
The Benefits of Kettle Bell Ab Workouts

Before we get into the exercises themselves, let's take a look at why kettle bell ab workouts are so effective. First and foremost, kettle bells are great for building strength and endurance. By incorporating them into your ab workout routine, you'll be able to work your core muscles in new and challenging ways.
In addition, kettle bell ab exercises are great for improving your balance and stability. Because you're working with a weight that's off-center, your body has to engage more muscles to stay balanced. This can help you build a stronger core overall, which can translate to better performance in other areas of your life.
The Top Kettle Bell Ab Exercises

Now that you know why kettle bell ab workouts are so effective, let's take a look at some of the top exercises you can do. Remember, it's important to start with a weight that's appropriate for your fitness level and gradually work your way up.
1. Russian Twists

Russian twists are a classic ab exercise that can be done with or without a kettle bell. To do them with a kettle bell, hold the weight with both hands and sit on the floor with your knees bent. Lean back slightly and lift your feet off the ground. Twist your torso to the right, bringing the kettle bell to the outside of your right hip. Then twist to the left, bringing the weight to the outside of your left hip. Repeat for several reps.
2. Kettle Bell Sit-Ups

To do kettle bell sit-ups, lie on your back with your knees bent and your feet flat on the ground. Hold the kettle bell with both hands and extend your arms straight up toward the ceiling. Slowly sit up, keeping your arms extended, until you're in a seated position. Then slowly lower back down to the starting position. Repeat for several reps.
3. Kettle Bell Windmills

Kettle bell windmills are a great way to work your obliques. To do them, hold the kettle bell in your right hand and extend your arm straight up toward the ceiling. Step your left foot out to the side and turn it out slightly. Then, keeping your arm extended, bend to the left and touch the ground with your left hand. Return to the starting position and repeat for several reps before switching sides.
4. Kettle Bell Plank Drags

Kettle bell plank drags are a challenging exercise that work your entire core. To do them, start in a plank position with your hands on the kettle bell. Drag the weight across the floor to your right side, then switch hands and drag it back to your left side. Repeat for several reps.
Conclusion
Kettle bell ab workouts are a great way to build strength, improve your balance, and tone your abs. By incorporating these exercises into your routine, you'll be well on your way to achieving your fitness goals. Remember to start with a weight that's appropriate for your fitness level and gradually work your way up.
Related video of Kettle Bell Ab Workouts: A Complete Guide

Looking to add some variety to your upper body workout routine? Dumbbell cross bench pullovers might just be the exercise you need to take your fitness to the next level. This exercise targets the muscles in the chest, back, and arms, making it an excellent all-around exercise for building strength and size. In this guide, we'll take a closer look at dumbbell cross bench pullovers, including how to perform them correctly, the benefits of this exercise, and how to incorporate it into your workout routine.
What Are Dumbbell Cross Bench Pullovers?

Dumbbell cross bench pullovers are a type of exercise that involves lying on a bench with a dumbbell in hand and lowering the weight behind your head while keeping your arms straight. This exercise is performed by placing your upper back on a bench with your feet firmly planted on the ground. From this position, you'll hold a dumbbell with both hands and lower it behind your head until your arms are parallel to the ground. Then, you'll bring the weight back up to the starting position, engaging your chest and back muscles throughout the movement.
How to Perform Dumbbell Cross Bench Pullovers

Here's a step-by-step guide on how to perform dumbbell cross bench pullovers:
- Grab a dumbbell and sit on the edge of a flat bench with your feet firmly planted on the ground.
- Lie back on the bench, so your upper back is resting on it.
- Hold the dumbbell with both hands, so it's directly above your chest with your arms straight.
- Slowly lower the weight behind your head, keeping your arms straight throughout the movement.
- Stop when your arms are parallel to the ground, then slowly raise the weight back up to the starting position.
- Repeat for the desired number of reps, focusing on engaging your chest and back muscles throughout the movement.
The Benefits of Dumbbell Cross Bench Pullovers

Dumbbell cross bench pullovers offer several benefits, including:
- Increased muscle activation: This exercise targets the muscles in the chest, back, and arms, making it an excellent all-around exercise for building strength and size.
- Improved shoulder mobility: Performing this exercise regularly can help improve shoulder mobility and flexibility, reducing the risk of injury during other exercises.
- Enhanced core stability: Keeping your core engaged throughout the movement helps improve core stability and strength.
- Greater range of motion: Dumbbell cross bench pullovers require a greater range of motion than other chest and back exercises, which can help improve overall flexibility and mobility.
How to Incorporate Dumbbell Cross Bench Pullovers into Your Workout Routine

Dumbbell cross bench pullovers can be incorporated into your upper body workout routine in several ways. Here are some ideas:
- As a primary exercise: Perform dumbbell cross bench pullovers as the primary exercise for your chest or back workout, starting with a light weight and gradually increasing the weight as you get stronger.
- As a secondary exercise: Use dumbbell cross bench pullovers as a secondary exercise to target the chest and back muscles after performing a compound exercise like bench press or pull-ups.
- In a superset: Pair dumbbell cross bench pullovers with another exercise like push-ups or rows to create a superset that targets multiple muscle groups simultaneously.
Conclusion
Dumbbell cross bench pullovers are an excellent exercise for targeting the muscles in the chest, back, and arms. By incorporating this exercise into your workout routine, you can improve strength, size, and flexibility while reducing the risk of injury. Remember to start with a light weight and gradually increase the weight as you get stronger, focusing on maintaining proper form throughout the movement.
Related video of Dumbbell Cross Bench Pullovers: A Complete Guide

Shoulder taps are a popular exercise that can be done anywhere, anytime, and without any equipment. They are a great workout routine for building upper body strength, improving your balance, and working on your core stability. Shoulder taps are also a perfect warm-up exercise for other workouts that require upper body strength. In this article, we will discuss what shoulder taps work and how they can benefit your overall fitness.
What are Shoulder Taps?

Shoulder taps are a simple exercise that involves getting into a high plank position, which means you are holding yourself up with your hands and toes, with your back flat and your core engaged. Then, you tap your opposite shoulder with your hand, alternating sides.
What Muscles Do Shoulder Taps Work?

Shoulder taps are a compound exercise that work multiple muscle groups at once. The primary muscles worked during shoulder taps include:
- Shoulders
- Triceps
- Chest
- Upper back
- Core
Benefits of Shoulder Taps

Shoulder taps offer many benefits for your overall fitness. Here are some of the benefits of shoulder taps:
- Builds upper body strength
- Improves core stability
- Increases balance and coordination
- Boosts cardiovascular endurance
- Helps prevent injuries
How to Do Shoulder Taps

Here are the steps to do shoulder taps:
- Get into a high plank position with your hands shoulder-width apart and your feet hip-width apart.
- Engage your core and keep your back flat.
- Lift your right hand and tap your left shoulder with it.
- Place your right hand back into the plank position and then lift your left hand to tap your right shoulder.
- Repeat the process for 30 seconds to a minute, depending on your fitness level.
Variations of Shoulder Taps

If you want to add more challenge to your shoulder taps, here are some variations that you can try:
- Wide-arm shoulder taps: Widen your hand placement to target your chest muscles more.
- Slow-motion shoulder taps: Do the exercise in slow motion to focus on your core stability and balance.
- Single-arm shoulder taps: Lift one hand off the ground and tap your opposite shoulder with the other hand.
- Shoulder tap push-ups: After each shoulder tap, do a push-up before tapping the other shoulder.
Conclusion
Shoulder taps are a simple but effective exercise that can help you build upper body strength, improve your balance, and work on your core stability. They are also a great warm-up exercise for other workouts that require upper body strength. By adding shoulder taps to your workout routine, you can improve your overall fitness and prevent injuries.
Related video of What Does Shoulder Taps Work?

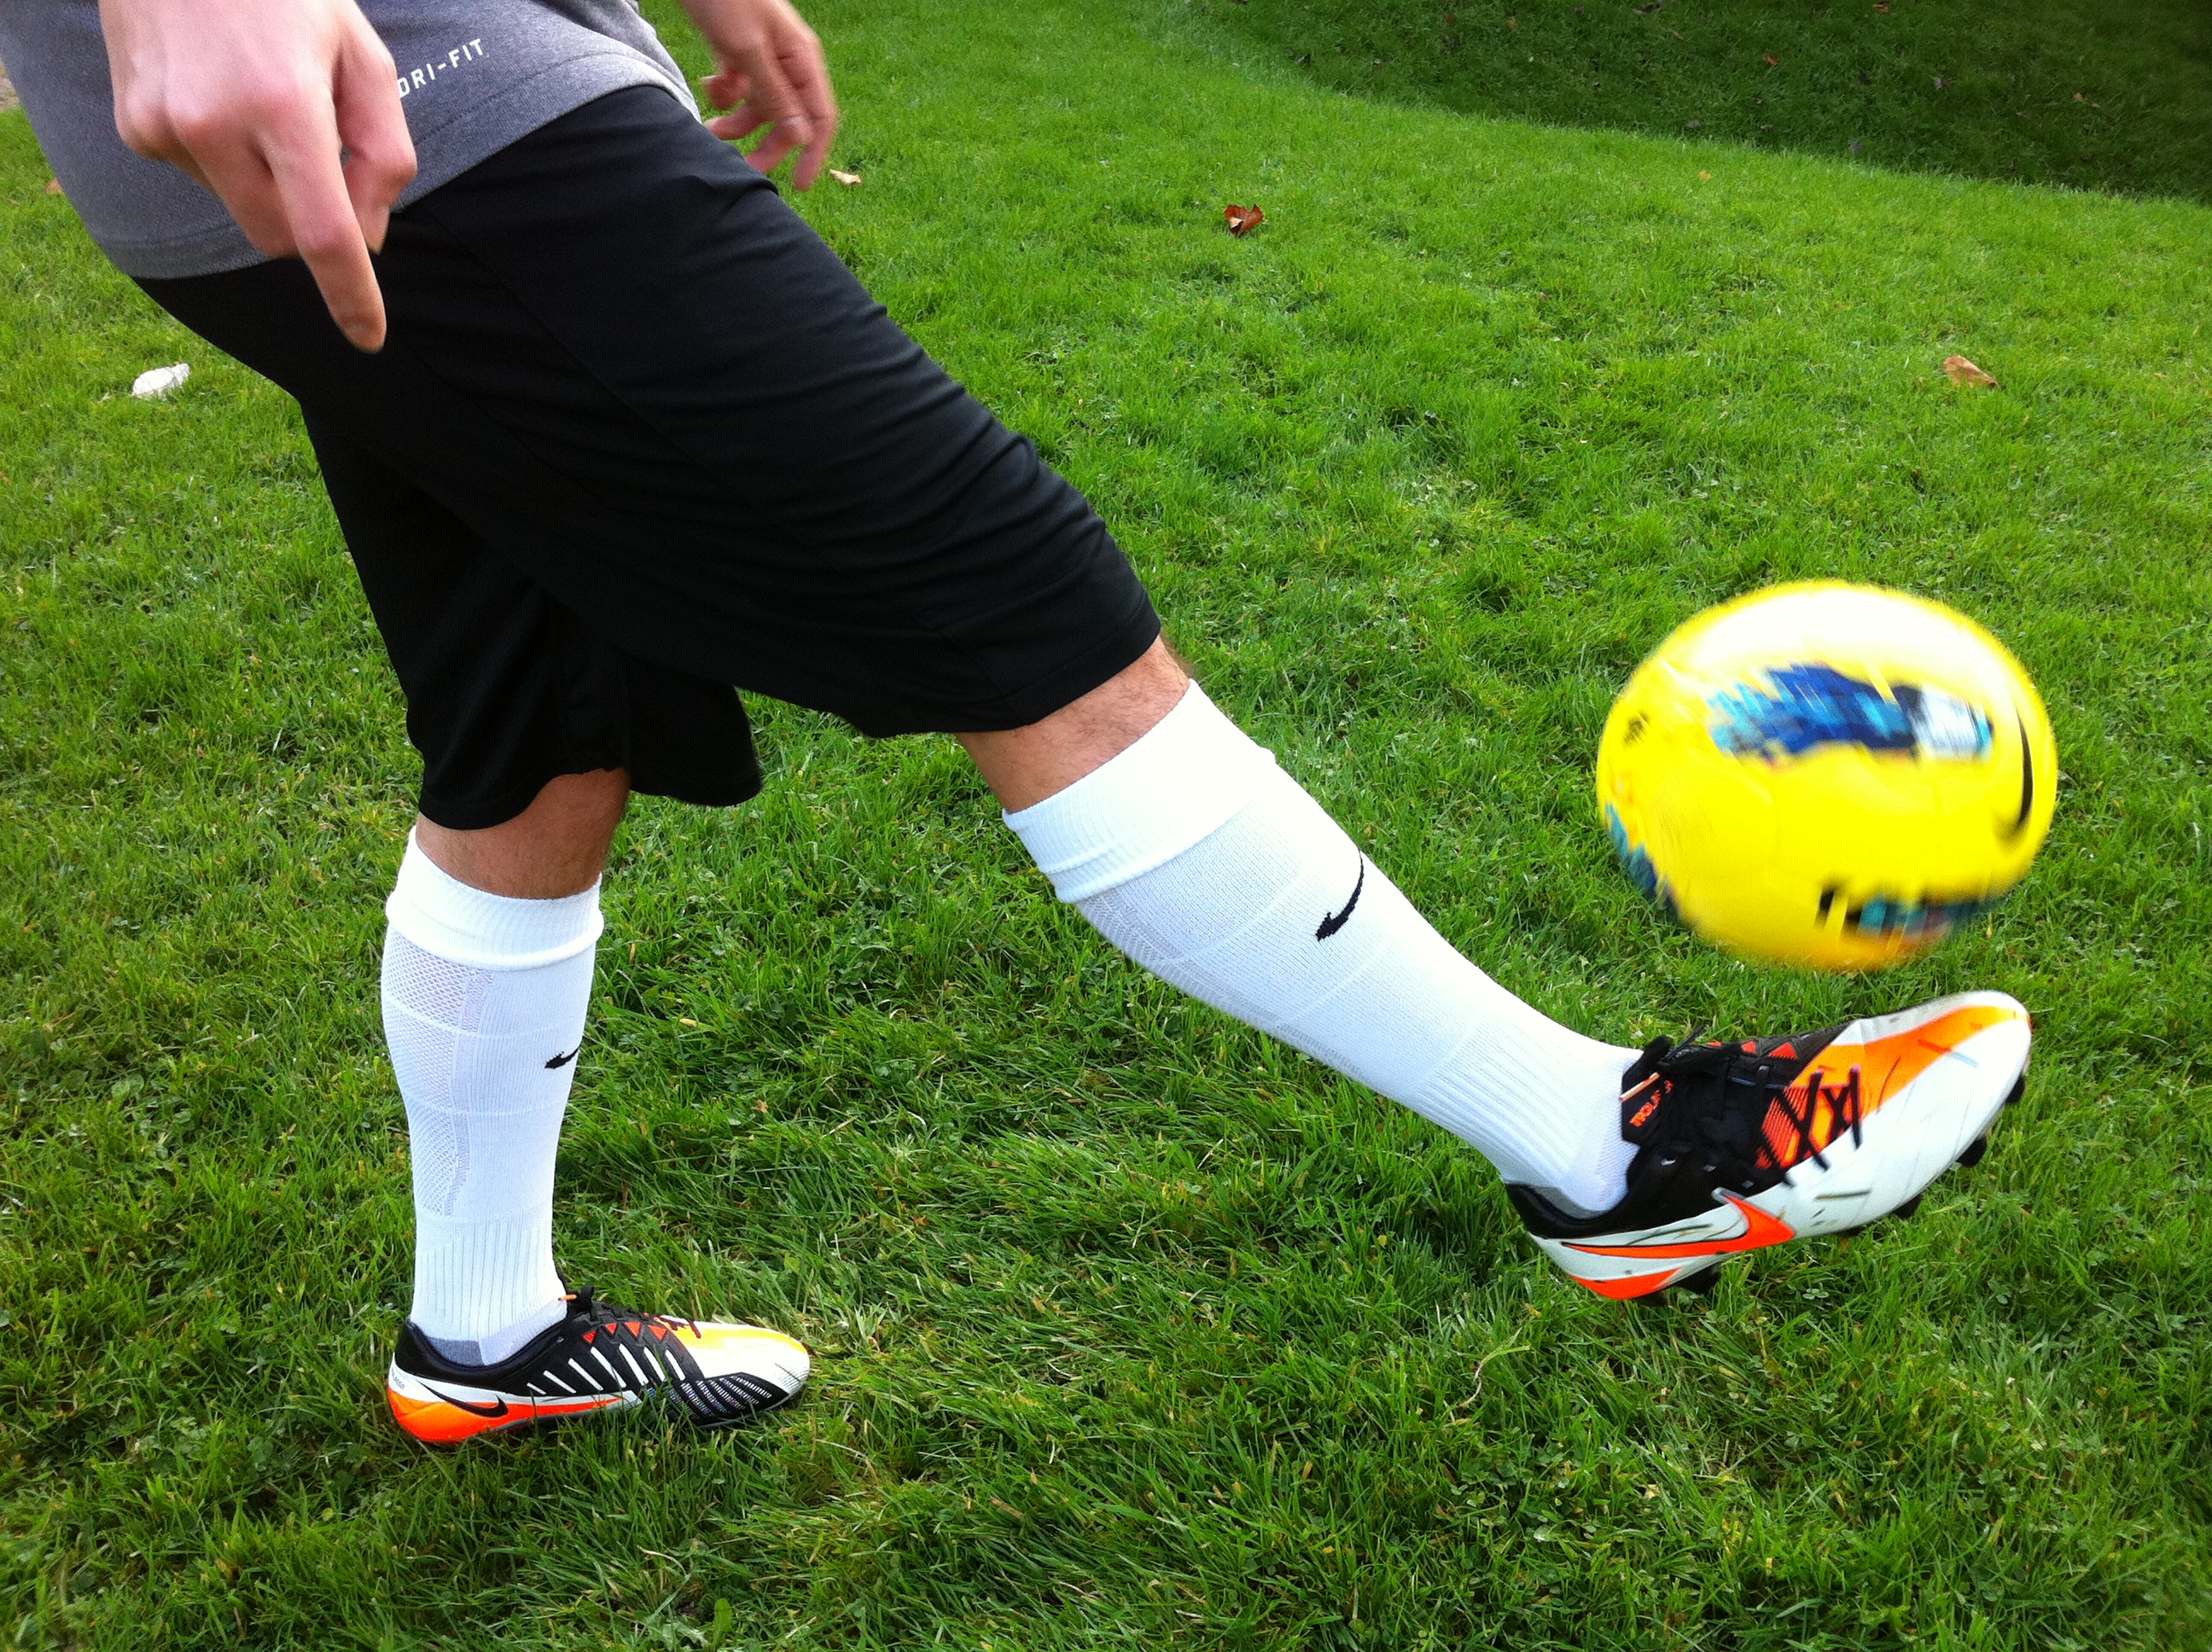
Learning how to do a kick up can be a challenging but rewarding experience. It requires balance, strength, and coordination. A kick up is a gymnastics move where you kick your legs up and over your head to land back on your feet. It is also known as a handstand to bridge or kick up to bridge. In this article, we will guide you through the steps on how to do a kick up.
Step 1: Warm Up

Before attempting any gymnastics move, it is important to warm up your body to prevent injury. Start with some light cardio exercises like jumping jacks or jogging in place. Then do some stretching exercises to loosen up your muscles.
Step 2: Find A Safe Space
Make sure you have enough space around you to perform the kick up safely. Choose a flat and even surface to avoid tripping or falling over. A gym mat or soft carpet can also provide extra cushioning for your hands and feet.
Step 3: Start With A Handstand

Begin by practicing your handstand. Place your hands on the ground and kick your legs up to balance on your hands. Keep your arms and legs straight and engage your core muscles to maintain your balance. Practice holding the handstand for a few seconds before bringing your legs back down.
Step 4: Work On Your Bridge

Once you are comfortable with the handstand, work on your bridge. Lie on your back with your feet flat on the ground and your hands by your ears. Push up with your hands and lift your hips off the ground to form a bridge. Keep your arms and legs straight and hold the position for a few seconds before lowering back down.
Step 5: Combine The Handstand And Bridge

Now it's time to combine the handstand and bridge. Start in a handstand position and slowly lower your hands towards the ground. As your hands touch the ground, kick your legs up and over your head to form a bridge. Keep your arms and legs straight and hold the position for a few seconds before lowering back down to the handstand position.
Step 6: Practice, Practice, Practice

Like any gymnastics move, the key to mastering the kick up is to practice regularly. Start with small progressions and gradually increase the difficulty as you improve. Practice in front of a mirror to check your form and technique.
Step 7: Tips And Tricks
Here are some tips and tricks to help you master the kick up:
- Engage your core muscles to maintain your balance.
- Keep your arms and legs straight throughout the move.
- Practice with a partner or coach for extra support.
- Visualize yourself performing the move successfully before attempting it.
Conclusion
Learning how to do a kick up requires patience, perseverance, and dedication. By following these steps and practicing regularly, you can master this impressive gymnastics move. Remember to warm up properly, find a safe space, and start with small progressions. With time and effort, you can achieve your goal of doing a flawless kick up.